
PRO_Mx_73-79/84 Mixing
Starting From Scratch
To start at the beginning, always make sure the mixer is ‘zeroed’ before starting a new project. By that, I mean make sure the input gains are at their minimum settings, the polarity reversals and high-pass filters are switched off, the EQ is set flat and bypassed, the auxiliaries are turned down, and any group routing is deselected. In the case of a digital mixer you could store this as a default memory from which to start each new project.
With the mixer in this kind of ‘safe’ configuration you can start to build a mix coherently, without having to cope with unwanted signals turning up in all sorts of strange destinations. There is nothing so frustrating, unprofessional and time-consuming as having to hunt down the source of the strange noises coming from one of your effects units! At least with analogue mixers the offending knob can usually be spotted quite quickly, but with assignable digital consoles it can be a nightmare — hence the importance of always starting from a known safe condition where everything is turned off. If mixing within the computer the same applies though the noise factor isn’t really an issue here, I personally put all faders to zero and mute all tracks before starting.
Subgrouping
It is a good idea to subgroup logical sections of your mix, such as the drum kit or the backing vocals, so that you can control the overall level of the subgrouped elements from a single fader or stereo pair of faders. On a hardware mixer you can do so using the busses-groups, like we will demonstrate in the lesson.
In computer set up, you have different options, depending of what you want to achieve. You can use busses, pretty much like with hardware, thus allowing you to insert one or more FXs at the group level (affecting all the tracks assigned to the group). Typically, EQ, compression or both, over the whole group.
In Cubase SX you would create a Group Track and then assign all the desired tracks to this group.
In Logic, you would assign each desired tracks to a stereo bus.
I would then suggest leaving the Group/Bus fader @ 0dB, and then start to balance individual tracks.
The other way to group tracks with computer set up is to “link” all the desired tracks the following way. In Cubase SX, in the mixer window, select the desired track, holding shift to select several, then control click and select Link channels, that way if you move the volume of one fader, all the others linked to this one will move as well, by the same amount. In Logic, each audio objects (tracks, instruments, etc..) have a group selector, you have 32 groups, so assign all desired tracks to the chosen groups (you can control more than just the faders, mute, edit in the arrange page, etc..)
Using this method, you will not be able to insert other FXs across the whole group, so why use this method rather than the first one.
If the tracks assigned to a group or buss have Fxs applied to them using the auxiliaries (FX send), typically Reverb or delay. When you lower the volume of the whole group, the amount of signal going to the FXs won’t change in relation, which means that if you were to bring the group fader down completely, you would still get the signal going to the Fxs, thus still hearing them (probably not what you want).
However a fix to that problem is to assign the Fxs themselves to the same group. The only problem for me is when you do a complete mute, it sometimes sounds more natural if you hear the Fxs decay naturally, whereas if the FXs are assigned to the same group, they will be cut as well.

Let’s get started
There are several different approaches to mixing, but most people like to start with the rhythm section, building the song up from there, bass, guitar or keyboard, etc… But I have seen engineers, especially when working with vocal driven tracks starting with the lead vocal and bringing in the most important instrumental parts first and then the rhythm section, or drums then vocals.
On Beat driven tracks it makes sense to start with the drums and rhythmical elements first, then Bass and so on.
If you mix a track that you’ve never heard before I would advise first to go through the individual tracks quickly to hear what they do and do a monitor mix fairly quickly so you can listen to the whole song to get a feel with it, so you can start to have an idea of what it should sound like in your opinion, which elements should be more prominent, it will help you to start making musical choices as well as finding out if everything sounds ok before you start diving into Eq’ing-compressing-etc.
I personally would recommend to try to listen to the whole track as much as possible rather than soloing every individual tracks all the time, always trying to keep a feel of the track, when you overwork in solo mode you can start to loose the whole picture.
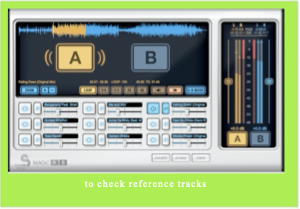
So as you listen and adjust a bit more your monitor mix, it is a good time to start listening to other records, to use as reference.
Referencing your mix
It is very easy to lose your way when starting out in mixing. Your attention is continually being drawn in different directions, concentrating on the different instruments and voices. This makes it very easy to become bogged down in the detail of the mix, rather than its overall balance. You also have to consider the general tonal balance of the mix and how it compares to commercial tracks of the same genre.
One way to create and maintain a reference on which to base your mixing decisions is to listen to examples of similar music released commercially. Playing suitable music CDs through the same monitors in the same listening environment will help establish the all-important sonic reference with which you can judge your own mix. Listen critically, and form opinions about both the spectral balance and the relative levels of different instruments. You may also be able to come up with some good ideas for reverb and effects settings, and maybe even a few production ideas!
Another trap to be wary of is that of ever-escalating listening levels. In general, the louder your monitoring level, the less accurate your perception of balance will be. This is because it is easier to hear detail in quiet elements of the mix when the whole thing is very loud. Turn the volume down to a more normal domestic listening level and the quiet bits will be completely lost! Far better to set a comfortable listening level with your reference music sources (which may be a little louder than a domestic level, but not too much), and then try to balance your mix at the same level. It is a little harder to do, but you will get better, more transportable results, with less ear fatigue and happier neighbours.
Basic Panning
The stereo field
Stereophonic sound, commonly called stereo, is the reproduction of sound, using two independent audio channels, through a pair of widely separated speaker systems, in such a way as to create a pleasant and natural impression of sound heard from various directions as in natural hearing. Ironically it is important to realise first that much of what we do when mixing for stereo tends to be fairly unnatural. In real life, i.e. outdoor, most normal music venues, etc, the levels of reverberation, wind direction, etc, can sometimes make it difficult to determine the positions of the sound sources with any degree of accuracy. You’ll usually perceive something about the characteristics of the space you’re in, but it’ll be difficult or impossible to figure out exactly where specific sounds are coming from. When recording and mixing, we can artificially separate sounds and we can control the amount and qualities of any reverberation that we add later. Most modern music production now takes full advantage of studio technology, the goal being to achieve the most artistically pleasing results, even if they are not necessarily the most technically accurate. With this in mind, let’s look at the basics of mixing for stereo.
Why stereo?
Even though we have witnessed lately a trend to surround 5.1, 7.1, even heard of 11.1???, the stereo format is still the standard when it comes to listening and thus mixing music. Ironically human have had the ability to listen in surround since the beginning. Actually over the years, technology has tried to accommodate this faculty, from mono to stereo, quadrophonia, surround, 5.1, etc…
Stereo is the best compromise of them all, it is compatible with mono, thus mixes will still sound reasonably similar on a mono system as what you intended. This is a very important factor since a lot of listeners still listen to music on a small mono portable radio. If mixing in 5.1 for example, the way the listener has positioned the speakers can have a major influence on how your mix is reproduced, where as stereo mixes will be compatible with every system, from top of the range hi-fi to mp3 player.
However, before starting on any considerations of stereo placement, it’s important that you get your overall mix balance somewhere close to where it needs to be. Set up an initial balance, it usually helps if everything is panned to mono while you’re setting up the initial balance, so that you can see how much natural separation the sounds have. Checking the overall balance from outside the control-room door can also be very revealing.
Basic panning
Once a basic balance has been achieved, you can start to work on the basic panning of the different sounds. The most important thing to bear in mind here is that low-frequency sounds work best when panned to the centre, typically Kick & Bass.
Low frequencies contain most of the energy within a typical mix, so it is best to share the load of reproducing them equally across both speakers. This means bass guitars; bass synths and kick drums shouldn’t be allowed to wander very far from the centre of the soundstage. If you have an artistic reason for putting a heavy bass sound to one side of the stereo spectrum, then it’s worth knowing that our ears aren’t that great at discerning much in the way of directional information from low-frequencies.

When using Bass synth, be aware of wide stereo sounds, although they can sound very pleasant to the ears, they can cause all sorts of problem at a later stage (i.e. when cutting a vinyl, wide stereo bass can mess up the grooves causing the needle to jump).
Lead vocals are usually positioned in the middle, well this is where you expect the singer to be, and this is the main point of focus in a song.
Backing vocals can go wherever it suits you, though splitting them left and right can be effective in creating a more interesting stereo image.
However, whenever you do split something left and right, take care not to make the image too wide. Spreading sounds between the nine o’clock and three o’clock positions of your pan controls can often work more effectively than when hard panned.
The same applies to the stereo outputs of synths or sound modules. These pseudo-stereo sounds can dominate the sound stage if panned hard to the extremes of the image, it is often tempting to do this with piano and drum-kit patches, but there is the danger in doing this that they end up sounding unfeasibly wide.
Using the pan controls on the console/virtual mixer to narrow stereo signals down often helps improve the focus of the mix enormously, as well as allowing any sounds that you really do want to pan to the extremes to work better in contrast.
NOTE ABOUT PAN CONTROLS:
Most hardware mixers have a majority of mono channels (8, 16, 24, etc.) and sometimes few stereo channels (most have mono only), so when patching a stereo signal, you would usually plug the left output from the device into one mono channel of the mixer (let’s say channel 1) and the right output into channel 2. You would then pan channel 1 to the left and channel 2 to the right. If you wanted to narrow the stereo width of the signal, you would adjust each pan control, for example channel 1 at 9 o’clock and channel 2 at 3 o’clock.
If using your sequencer virtual mixer, you still can apply the same technique, but the procedure will be different, depending on the software you use. We’ll demonstrate in Cubase SX & Logic Pro, as they both deal with issue in very different ways.
A general guideline is that your final mix should sound reasonably balanced on each side, so you don’t end up with one side much louder than the other, unless you want to simulate the 60s “stereo” (which wasn’t), drums & vocals hard panned on one side, bass, piano & guitar on the other, etc…
Typically, if you have drums & percussions, you would have kick & snare in the middle, hi hat slightly panned one side, and maybe a tambourine panned opposite the hi hat (to the higher range), the maybe some congas panned one side and bongos the other, etc…
The same applies to other instruments, for example Guitars. A typical trick when recording guitars would be to double track it (the exact same part played twice), so in the mix you can pan each track opposite to create a wider stereo sound (as mentioned before don’t always use extreme panning). This is used a lot with backing vocals too.
However, one thing that should always be set to maximum stereo width is the return from any stereo reverb unit and other stereo FX.
Use Your Ears
After all, we’re working with audio here! I’m making mention of this seemingly obvious point because with the plethora of software based EQs and visual displays, it’s easy to begin “looking” at your mix instead of listening to it. Use the visual references to better understand what you’re doing, but listen carefully to the way you’re effecting the sound. Notching out the wrong frequencies will not only fail to accomplish our goal of creating more definition between tracks, but will also rob the track of frequencies that may be important to the character of the sound.
Also because the EQ settings don’t look right (sometimes you may have extreme settings), it doesn’t mean that it doesn’t sound right. I have heard few engineers saying to artists or producers, “no you can’t do that, it’s not technically correct”, if it works musically, then it’s “right”.
Some Dos & Don’ts
Reverb for Drums & Percussion
Close-miked drums have very little room ambience, unless you’re working in a nice live room and are adding ambience mics into the mix. The same is true of drum machines where the samples are unprocessed. Kick drums can be problematic if you add any obvious reverb, as the resulting wash of low-frequency reverb can really muddy up the low end of a mix. Using a short ambient setting is generally better and can help make the sound more snappy and punchy. One of the reasons an ambient setting adds punch is because the extra reflections generated by the reverb process add to the dry sound, stretching it out over a longer period. Unlike conventional reverb, however, the ambient reflections die out fairly quickly, before they have a chance to confuse the sound. Gated reverb also works well on kick drums for the same reason, though you should use this effect sparingly unless you want your drum part to have that “sound”.
The snare drums are usually what define the “sound” of the overall drums, except in dance music where the PHAT Kick drives the track. You can usually get away with adding more reverb to snare drums, as they don’t generate much in the way of very low-frequency components. Plate settings are commonly used, because they’re flatteringly bright and have a fast attack, although you should avoid using an excessively long decay time (over 2 secs) unless the music is slow and leaves lots of space for the reverb. In fact, a good rule of thumb is that the faster and denser the track, the shorter the reverb decay time needs to be.
A typical snare reverb setting can be anything from subtle one-second decay, or even less, up to an obvious three seconds or more, but the perceived effect also depends a lot on the wet/dry balance of the sound. With very short reverb settings you can often mix in more reverb, to create a very live sound, but without allowing the mix to get messy. A common trick is to use a heavy dose of short, bright plate or tiled-room ambience to add life to a dull snare sound. For a bigger sound, pick a short hall setting or longer plate and experiment by adding a little pre-delay to give the drum hit something of a slap-back feel.
Toms tend not to need a lot of added reverb (unless you’re after that overstated ’80s rock sound, of course), as they have a longer natural sustain than the other drums in the kit. However, short settings can make them sound more powerful and give them a sense of place, so don’t leave them completely dry.
If you’re miking your hi-hats separately, again try a short ambience or plate setting to make the sound more three-dimensional. What you’re after is a sense of space and high-frequency detail, without a long reverb tail.
Percussion sounds also benefit from added ambience, but long reverb on percussion tends to be used only in film/TV music or slow atmospheric music (i.e. New Age), and even then only where there’s a lot of space in the composition, so that the reverb can breathe. The musical arrangement and the choice of sounds dictates the amount of space you have to play with, but in TV and film music it’s not unusual to hear very spacious passages, where triangles or odd percussion instruments are treated with very long, bright reverb settings.
Traditionally, the kick drum is treated with the smallest amount of additional reverb and the snare with the largest; toms come somewhere in between. However, these days there are more opportunities to break musical rules, so let your ears decide what works. You’ll need to experiment with the reverb level added to any overhead or ambience mics, as so much depends on the natural characteristics of the room.
Finally, be aware that the quality of ambience and other short reverb settings varies enormously from one reverb processor to another. So when mixing acoustic material which requires very realistic spaces, you will tend to use your best quality reverbs, however there are times when an obviously trashy reverb sound can work really well in the mix, so don’t throw out all your cheap boxes.
Be aware of Reverb Modulation
If you have a reverb unit or plug-in that offers internal pitch modulation, or you want to experiment by putting chorus before a reverb, make sure the treatment is appropriate for the instrument you’re working with. For example, a heavily modulated reverb can be quite flattering on strings, but will sound totally wrong on acoustic piano, where even the slightest hint of pitch modulation sounds unnatural. The same applies to solo harp, classical guitar, and so on, whereas brass and other ensemble sounds can sometimes be made to sound a little richer by the judicious application of modulation. For electric guitar (and some synthesizer sounds), heavily modulated reverbs can work nicely, because a natural sound is not a prerequisite for an electric guitar! As a rule, the more ‘classical’ the instrument or the production, the more you should steer away from modulation and aim instead to create a natural-sounding room ambience.
Note about Guitars
The electric guitar is often associated with a spring reverb sound, not necessarily because springs sound great, but because that’s the sound we’ve grown up with. Many ‘Classic’ Guitar amp had a built-in spring reverb unit, which in some cases really contributed to the status of fame some have achieved (i.e. Fender Twin reverb).
Many reverb units include spring emulation, and some models do a better job at simulating the good or bad aspects of spring!
For certain styles, it’s worth experimenting with different reverb types, with and without pre-delay, to see what variations you can get. For example, if you want that big, ‘Floyd-y’ sound, compress the guitar and then treat it with a large, bright hall reverb setting. This can be very effective in the right context, but the usual rule applies: only use this treatment where there’s space for the effect to breathe.
It’s also well worth trying gated and reversed treatments. Gated patches, in particular, can be useful for creating spaciousness and impact without filling in the spaces between notes, and they can provide a useful alternative to ambience settings.
Bright plate reverb patches work well with acoustic guitar if you’re after that American West Coast sound, but keep the reverb time reasonably short or you could drown the sound.
Ambience
Today’s music tends not to use as much “very obvious reverb” as before, but instead relies a lot on so-called ambience algorithms. These recreate the early reflections of a natural room but add little or no reverb tail, thus recreating the effect of a live room. Ambience can be used to make close-miked or synthesized sounds sit more convincingly in a mix. Because the extra reflections add to the original sounds, percussive parts treated with ambience often sound more powerful. Convolution reverbs are ideally suited for that job.
A sense of space
So far I’ve been talking about creating a natural sound, but in pop music natural isn’t always best. For example, you can pan the dry sound hard to one side and all the reverb to the other to provide an enhanced (albeit unreal) sense of space. This works particularly well if you use a generous amount of pre-delay. Furthermore, some producers will deliberately use a mono reverb (panned to the same place in the mix as the dry sound) to provide a more focused position for the sound.
While widely panned reverb increases the general sense of spaciousness, it actually decorrelates directional information to such an extent that it’s often difficult to be precise about where the sound is supposed to originate from.
For more control over your reverb sound, patch a delay line between the effects send and the reverb input. This provides more control than the pre-delay found in most reverbs; for example, adding a bit of feedback can create a more complex reverb effect.
The Bottom line
When setting up a mix, try to get the mix sounding close to right before you add any effects or signal processing. Once you’ve got this right, add further vocal compression if needed and also apply just enough reverb to make the vocals sit comfortably with the backing track. When you’re happy with the overall timbre and balance, adding effects for ‘effect’ should be easier. Remember that, in most cases, effects are there just to add the final gloss, they won’t compensate for a poor balance or bad basic sounds. Home demos often use far too much reverb, and the result is a cluttered mix with no space.
For all the technology we have to play with, our most valuable tools are still our ears, so I’ll end as I started, by suggesting that you spend some time listening to how different styles of music have been mixed and how the most successful reverb treatments have been chosen to enhance the arrangement.