More Creative Mixing Techniques
A further way of adding interest to effects is afforded to us by the recording process, which enables us to make use of negative time.
In Reverse
A further way of adding interest to effects is afforded to us by the recording process, which enables us to make use of negative time. By this, I mean effect sounds which are audible before the sound that they process even starts playing, something that the physical laws of real life don’t allow. Once something is recorded, temporal rules can be broken. Sounds can be reversed, they can be treated with reverb or delay that starts before the sound itself, or reverse reverb can be added to a ‘right- way-round’ sound. This latter trick used to be popular during the ’70s for music production, is still used extensively in film work to create demonic voices, and is still used typically on vocals (i.e. Tainted Love by Marilyn Manson).
When analogue tape was the standard recording medium, playing a tape backwards, feeding the desired track through a reverb unit, and then recording the reverb to a spare track produced reverse reverb. Once the tape was replaced on the machine the correct way around, the reverb track would start playing before the track it was derived from, with the reverb sound’s envelope building up slowly in a suitably eerie manner. The same trick can be achieved in a tapeless environment (such as within a MIDI+ audio sequencer) by reversing a section of audio, adding reverb or delay, bouncing the processed result to a new track, then reversing both tracks again.
 Another method, if you have a reverb with a true reverse function (like the space designer in Logic pro7), is to apply a fairly short reverse reverb, bounce the effect alone, then bring the track onto the arrange page before bringing the reverse reverb forward so that it starts before the original dry signal. This works excellently with vocals and drums.
Of course the other thing that’s very easy to do in a tapeless environment is set up a conventional reverb, record this to a spare track, and then slide it a beat or two ahead of the track being processed. This produces reverb that’s the right way around, but which still comes before the sound that supposedly created it, you could almost think of it as negative pre-delay!
Distortion
Another effect that can be used in creative ways is distortion. Usually associated with electric guitars, distortion can be applied for other applications. Distortions and overdrives can be creative in many different ways and we shall look at some other applications now.
Distortion pedal effects or plug-ins can be very useful. You could, for example, use an aux to feed into it, and bring back the unit on another channel. Try sending a bit of the drums into it as this can add a nice crunch to the beat. You can use the same process for other parts. Used in subtle manner, distortion can add a nice edge and warmth to the sound.
 For a more radical effect, you can simply insert it on the channel. Heavy distortion can work well on bass, keyboards and some vocal parts. Remember they are no rules – try it, for example, with an acoustic piano; you’ll get some really interesting harmonics.
If using an analogue mixer, try to overdrive the channel gain until it distorts in a way that you like; different desks will give you different types of distortion, some more pleasant than others. They can sound very good on a lead vocal. I’ve had interesting results by overloading the inputs of various devices. Among my favourites are: my old trusted friend the Roland tape echo, the sampler EMU SP1200, and a Dictaphone.
Again, remember that the main rule in being creative with audio is that there are no rules. Quite often devices used in applications other than the one they were intended, can give pleasing, unpredictable results.
Natural vs. Artificial Environments
As we have mentioned several times by now, all naturally occurring sounds are coloured by their environment, and we associate certain types of sound with specific acoustic spaces. In the studio, we usually use effects to simulate a plausible environment for DI’d sounds, the most obvious choice of effect being reverberation. Even so, the result often turns out to be more impressive as a spectacle in its own right than an accurate emulation of nature. Perhaps it’s this lack of a breathing, organic environment that has sent people chasing old technology, such as tape echo units or valve processors, to try to put some of the character back. The key to the ‘organic-ness’ (or lack thereof) of electronic instruments is largely down to the amplifier and loudspeaker system used to reproduce them, and to the acoustic environment in which that amplifier is placed.
If the instrument is DI’d – like all virtual synths are – then the performance loudspeaker is the studio monitor or end-user’s hi-fi system, and the acoustic environment can be anything from a studio control room to a bed-sit in Putney. In other words, by DI’ing the instrument, you completely bypass the organic quality that comes from live performance in a specific acoustic environment.
DI’d keyboards work on an artistic level. We are used to hearing music made in that way, so our frame of reference is already based on artificial values (after all synths in electronic music aren’t supposed to recreate real instruments). Having made that point, all but the most ardent electronic music protagonists seem to agree that a piece of music sounds far more human or organic if at least some of the instruments are real rather than being all synthesized.
Miced Amps
 The wonderful thing about instrument amplifiers is that they do so much more than simply make a sound louder. All the best-loved instrument amps, whether for guitar or keyboard, introduce their own subtle, or otherwise, distortions and colorations.
Before modern full-range keyboard amps were developed, keyboard amps were more like guitar amps, often fitted with 12-inch speakers and no tweeters. This limited the high frequency response of the systems quite severely, and had the effect of rounding off harmonically rich tones. At the same time, the open-backed speaker cabinets, so popular at the time, behaved most irrationally at low frequencies, and created a deep, pleasing, and totally inaccurate bass end. For example, if you have a digital keyboard pad sound that seems a bit too thin and is a little too gritty around the edges, simply plugging it into a guitar combo will filter all the edge out of the sound without actually making it seem dull, and the uncontrolled speaker response at the lower-mid and bass end will fatten the sound up quite nicely. You could of course do a similar thing using a guitar preamp and a speaker simulator, but then you’d lose the opportunity to mic it up and add a little real-world ambience.
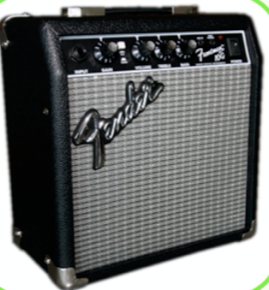
Small practice amps often sound wonderful when miced up, and because they’re not as loud as a performance amplifier, you don’t have as many problems with isolation. Stories abound of famous musicians using the Tandy Microamp (which is little more than half an intercom in a plastic box) to record everything from guitar to harmonica. Other practice amps heavily used are the small Marshall and Fender, great on guitars (and vocals). And while we’re on the subject of guitars, if you need to create an overdriven guitar effect from a synth, how better to do it than plug it through a guitar amp and turn up the overdrive? This invariably sounds better than the digital distortion effects built into synths.
 If you have a small combo or practice amp, you can also experiment by connecting it to different speakers; even the most unlikely combinations can work extremely well. For example, an old TV or car radio speaker might distort in a particularly vigorous and interesting way when driven hard. Similarly, if you’re after a boxy sound, don’t resort to EQ straight away, stick a small speaker inside a tea-chest or large cardboard box with a mic, and go for the real thing!
I’ll finish off where I came in, by saying that the amp isn’t just something to make the sound louder; it’s a significant part of the instrument. How about trying that little Marshall practice amp in your bathroom in a dryer environment.

If you don’t have any amp and would rather use an amp simulation, you have various options available, hardware and software. Among them are: Line 6 POD (hardware), Amplitube (software), and Guitar Rig (software).
Using Exiting Samples
Clearing samples
The use of samples appeared with the birth of sampler machines in mid 80s, and has remained an important part of producing music, vocal hooks, drum loops, musical riffs, etc. We use samples for different reasons, mainly for the musical content (especially if it’s a well-known sample), and very handy if you can’t play an instrument, but also because of the “sound” and its limitations in manipulation. Samples add a new dimension to the final sound (especially if you sample from vinyl)
Although it has nothing to do with the subject of mixing, I would like to draw your attention quickly to the aspect of copyright when using samples.

First, we should define sampling and explain why it raises legal issues. Sampling is the technique of taking a small piece, or “sample,” of a pre-existing piece of music and using the sample to create or enhance a different, new piece of music. Legal issues arise because the copyright law allows only the copyright holder of a work of art to make derivative works or changes in the original work. Sampling potentially violates the law regarding two separate copyrights, the copyright of the musical composition and the copyright of the sound recording. You need to obtain the permission of those copyright holders before using the original song or master. The process of getting that permission is known as clearing the sample.
Music Clearance is the process whereby permission is obtained from the owner of a song (the people who wrote it) and a master recording (the people who recorded it), which you wish to use in your production. In order to understand music rights, you need to understand the difference between a song and a master recording.
For every song written, any number of artists may have made their own recording. But whichever recording you are sampling from, you will need to obtain permissions from all
You cannot use any master recording without getting permission from the publisher(s) to use the song. Conversely, if you gain permission from the publisher, but are denied use of a particular master recording, you can always use a different master recording or record your own master, with the publisher(s) permission.
Clearing a Song
Any number of composers can be involved in writing one song and each may have separate publishers. A music publisher, to generalize, acts as the representative of the composer for their individual rights in regards to anyone using their song.
In order to clear a song, it is necessary to locate and contact the representative of each composer, confirm their ownership or administration percentage rights (i.e., do they own 50% of the song?), and negotiate a fee for use of their share of the song. Composer’s representatives are usually music publishers.
Negotiating a fee for use of a song is based on the type of production you have (such as a film, television show, corporate meeting, trade show, commercial, CD-ROM, web site, compilation record, etc.) Other factors involved in the negotiating process are how much of the song is used and the manner in which it is used. There are a number of rights within all these different media, which can include synchronization rights, mechanical rights, performance rights, etc.
Clearing a Master Recording
Clearance of the master recording has nothing to do with clearance of the song. Publishing companies and record companies are almost always totally separate entities. You will need to get the permission from the owner of the recording rights – usually the record company – to use a sample from a certain recording.
As an example, “My Way” was recorded by Sid Vicious, Frank Sinatra and many others (so you would have to contact the record company for the relevant recording), but was originally composed by Jacques Revaux, with French words by Gillis Thibault. Subsequently, English words were written by Paul Anka, so you would have to contact all the publishers involved. This is a perfect example of how complicated an apparently simple music clearance can become.
Typical Sample Clearance Fees
The costs for sample clearance are negotiable, and there are no standard fees. However, as a general rule, the music publisher usually wants an up-front “advance” payment (which could be anywhere between £200 and £4000+) plus a percentage of the song income (usually between 15% and 50%. However, if the sample is a major part in the final piece it can go up to 70/80%).
The owner of the master recording will also want an up-front payment (usually at least £500), plus a “rollover.” A rollover is a payment that’s made when a certain number of copies have been sold. Sometimes, instead of a rollover, the owner of the master may want a portion of future record royalties (although sampling consultants advise against this practice).
Sample clearance rates have become so steep that it’s often difficult for small independent labels to acquire clearance. For example, one independent artist with a recording budget of £15 000 spent £7500 on up-front payments for two samples. As one music attorney put it: “Today, you pretty much have to be associated with a major to pay the rates.”
Some owners of source music won’t even deal with independent or unsigned artists because they don’t sense enough of a financial return to bother. “A lot of times if it’s self-released, we say come back when you have a deal,” says a sampling rep at one major music publisher. In other words, the publisher or label may take a laissez faire attitude until you’re making money.
Here’s the Catch-22: In order to get a signed sample clearance agreement, you’ll probably have to provide the copyright owners with a recording that shows how much of the source you intend to use, and how you intend to use it. So you’ll likely be doing your recording first, with no permission. If you then find that you can’t get permission, a lot of hard work will have gone to waste.
Have a Plan B
A common error is the failure to plan far enough ahead and to not have enough alternatives if a sample is rejected. Sometimes it can take months to get all of the approvals. Also, remember, many copyright owners – for example, the Beatles – have a no-sampling policy. If the sample request isn’t approved, be prepared to replace the sample with something else.
Find Sample-Friendly Copyright Owners
Some copyright owners are happy to clear samples – so much so that they encourage the process. For example, copyright owners of songs by the Average White Band and the Gap Band have pro-actively sought to promote their music for sampling. Tommy Boy Records has also made it easy to acquire clearances.
Contact the Artist or Songwriter Directly
If you run into problems with a music publisher or owner of a master, you may have better luck contacting the artist directly. This works if the artist still has some say or control in what gets cleared. For example, Shirley Manson of Garbage wanted to use the line, “You’re the talk of the town,” at the end of a song. Lawyers for the band ordered her to drop it, but Shirley called up Chrissie Hynde, who sent the following letter to Garbage’s attorneys: “I, Chrissie Hynde, hereby allow the rock band Garbage to sample my songs, my words, and indeed my very ass.”
Recreate the Sample
Some artists have avoided paying part of the sampling clearance fee by re-recording the sampled section. You will still need to seek permission from the music publisher, but not from the owner of the master recording. How does this work? Let’s say you want to use a six-second sample from “Green Onions.” Instead of sampling the original recording, you play the parts yourself and re-record the music to sound exactly like the original. In that case you have not infringed the master recording. (Due to a quirk in copyright law, you can only infringe a master recording if you actually copy it – not if you imitate it). You will not need to seek permission from the master owner, and you don’t need to pay any fees to the master owner.
Cleaning up Your Samples
Because samples are lifted out of already mixed and mastered recordings, there is sometimes very little need for further processing, and sometimes they just sit nicely in the mix, without further effort. However, it depends very much on the quality of the original sample and the effect you are after.
Samples taken from a CD or DVD are usually quite clean, as they probably have already been re-mastered and cleaned along the way, but samples taken from vinyl, tapes (cassettes, videos, for example) can have a considerable amount of noise, which might obstruct the clarity of the overall mix. Typical noises that can interfere with the clarity of your mix are hiss, vinyl crackles and hum. There is some software and hardware that can solve many of these problems.
Hum is a low frequency rumble, typically produced by turntables, for example. Because they happen at low frequencies, 60Hz and below, they are quite easy to get rid of using a Hi pass filter or by attenuating low frequencies with EQ, without affecting too much the overall tonal frequency content of the sample. Although we don’t perceive it so much on smaller speakers, once removed, you will notice how clearer and tighter the bottom end is.
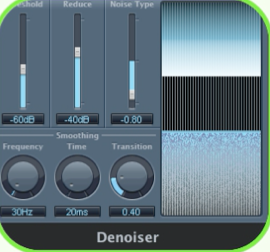
Hiss happens at high frequencies, so again can be removed or attenuated using a low-pass filter or by applying a cut in the high frequencies with EQ. However, there are times when the hiss is very loud in volume and has a lower frequency bandwidth, so that it is present in the high and hi- mid frequencies. In this case, using a filter or EQ just won’t be enough. There is some hardware and software that can reduce noise without affecting too much the frequency content (without dulling the sound too much). Logic has a ‘Denoiser’ under its specialized tabs and this can be useful for attending to unwanted frequencies.
Clicks and crackles are usually the result of vinyl wearing out, or due to a digital click. It’s very difficult to remove a click with EQ without affecting the overall sound too much. However again there are a few plug-ins available (again usually as part of restoring/ mastering bundles).
Once all these noises are attenuated or removed, you will notice how your whole track becomes much clearer, especially in the top end, leaving space for hi hats, vocals, etc.
Some plug-ins you might want to try out are: the Waves restoration bundle, Arboretum Ray Gun, and those by Steinberg (although quite old, they still do the job).
EQ’ing Samples
In addition to using some of the plug-ins mentioned above to clean up samples, there are times when you might want to have a bit more control over your sample. For example, in some tracks you might have a sample that plays pretty much the whole or main part of the song (i.e. bass-line, keyboard, etc.). If you wanted to have a bit more control over the individual elements, the volume, and to add further processing, a technique consists of splitting the sample over several outputs on your desk (or virtual mixer), so that the same sample plays from different channels. You can now start working on each of them separately
The usual trick consists of splitting a sample over two channels, so that you can now EQ one channel to isolate the bass, for example, cutting out all mid and high frequencies, even compressing that channel or adding a sub bass plug-in if the bass is a bit light, which might be the case on some older recordings. Then, on the other channel, do the opposite so that the bass disappears from the signal, leaving only the keyboard part, for example – although be careful of not thinning the sound too much. You can also process this part further, if need be, adding reverb, chorus, or a stereo spreader for a larger picture (if using a mono sample) without affecting the bass part. Now you can have almost total control over the individual elements of the sample.
